Prep Time: 20 minutes
Resting / Proofing Time: 1 hour 30 minutes
Cook Time: 10 minutes
Total Time: 2 hours
Intensity Level: Medium (requires patience for rolling and high-heat cooking)
The Story Behind This Recipe
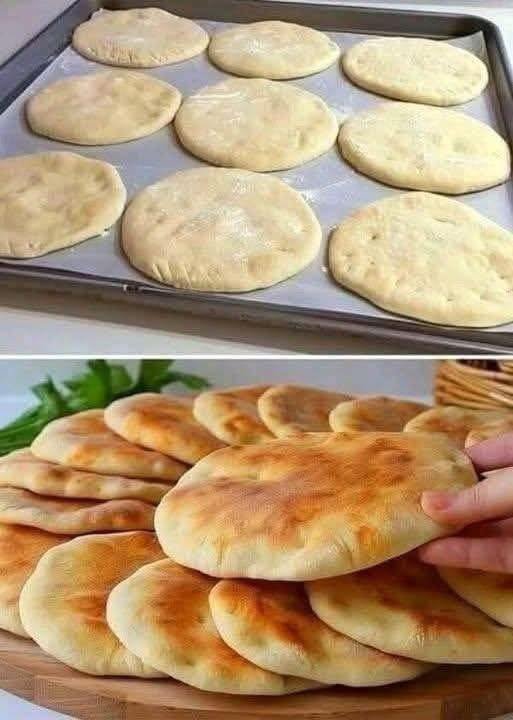
There is nothing quite like tearing into a warm, freshly baked pita bread straight from your own skillet or oven. Unlike the dry, brittle store-bought versions that crack along their seams, homemade pita is soft, pillowy, and—when done right—puffs up into a dramatic, perfect pocket every time.
This recipe delivers exactly that. The “intensity” here is not about difficulty, but about timing and temperature. You’ll need a gentle hand when rolling the dough and a very hot cooking surface to trap steam. Once you master those two things, you’ll never buy pita again.
Time & Intensity Breakdown
| Phase | Duration | Intensity (1-5) |
|---|---|---|
| Mixing & Kneading | 10 min | 2 (easy) |
| First Rise (Bulk Fermentation) | 60 min | 1 (passive) |
| Dividing & Shaping | 10 min | 2 (easy) |
| Bench Rest (Second Rise) | 20 min | 1 (passive) |
| Rolling Out | 5 min | 3 (needs gentle touch) |
| Cooking (per batch) | 10 min | 4 (high heat, watch closely) |
Total Active Time: ~35 minutes
Total Passive Time: ~1 hour 25 minutes
Overall Intensity: 3/5 – Beginner bakers can succeed, but you must follow the heat and rolling guidance closely.
Ingredients
For the dough:
-
3 ½ cups (450g) all-purpose flour or bread flour (bread flour gives chewier pitas)
-
1 ½ teaspoons (9g) fine sea salt
-
1 tablespoon (12g) granulated sugar (feeds the yeast, not for sweetness)
-
2 ¼ teaspoons (7g or 1 packet) instant dry yeast
-
1 ¼ cups (300ml) warm water (110°F / 45°C)
-
2 tablespoons (30ml) extra virgin olive oil or neutral oil
For cooking:
-
Olive oil or flour for dusting the work surface
-
No oil in the pan (dry heat is best)
Nutrition Information (per 1 pita, without added oil)
| Nutrient | Amount |
|---|---|
| Calories | 210 kcal |
| Protein | 6g |
| Carbohydrates | 40g |
| Fiber | 2g |
| Sugars | 1g |
| Fat | 3g (mostly from olive oil) |
| Saturated Fat | 0.4g |
| Sodium | 370mg |
| Potassium | 85mg |
| Iron | 2.5mg (15% DV) |
*Note: Nutrition calculated using all-purpose flour and 2 tbsp olive oil divided across 8 pitas.*
Step-by-Step Instructions
1. Mix the Dough (Intensity: Low)
In a large mixing bowl, whisk together the flour, salt, sugar, and instant yeast. Important: Keep the salt and yeast on opposite sides of the bowl initially – salt can slow down yeast if they touch directly. Make a well in the center. Pour in the warm water and olive oil. Stir with a wooden spoon or dough whisk until a shaggy, messy dough forms.
2. Knead (Intensity: Medium – 10 min)
Turn the dough onto a lightly floured surface. Knead for 8–10 minutes until smooth and elastic. The dough should be soft but not sticky – add tiny pinches of flour if needed. To test: stretch a small piece; it should thin out without tearing (windowpane test). Alternatively, use a stand mixer with a dough hook on medium-low for 7 minutes.
3. First Rise (Intensity: Very Low – Passive 60 min)
Lightly oil a clean bowl. Place the dough ball inside, turning once to coat. Cover with a damp towel or plastic wrap. Let it rise in a warm, draft-free spot (75–80°F / 24–27°C is ideal) for 1 hour, or until doubled in size. Colder kitchen? Let it go 90 minutes.
4. Divide & Pre-shape (Intensity: Low – 10 min)
Gently deflate the dough by pressing down. Turn it onto a clean surface (no flour needed yet if it’s not sticky). Divide into 8 equal pieces (about 85–90g each). Shape each piece into a tight, smooth ball: cup your palm over the dough and roll it against the counter in small circles.
5. Second Rise (Bench Rest – Passive 20 min)
Place the dough balls on a lightly floured surface, cover with the damp towel, and let them rest for 20 minutes. This relaxes the gluten, making rolling much easier. Do not skip this. If you roll immediately, the dough will spring back and your pitas will be dense.
6. Roll Out (Intensity: Medium – Gentle, 5 min total)
This is the most critical step for creating the pocket.
Keep your work surface lightly floured. Take one dough ball and flatten it with your palm. Using a rolling pin, roll from the center outward, turning the dough a quarter turn after each roll. Aim for a 6- to 7-inch circle, about ¼-inch thick. Do not roll too thin – pitas need enough structure to trap steam. Too thin = no pocket. Too thick = raw center. Move the rolled pita to a floured baking sheet or parchment paper and cover with a towel while you roll the rest.
7. Heat Your Cooking Surface (Intensity: High – Active heat)
Choose one of two methods:
Method A (Best for pockets): Stovetop skillet. Heat a cast-iron skillet or heavy non-stick pan over medium-high to high heat for 2–3 minutes. It must be very hot – a drop of water should sizzle and evaporate instantly. Do not add oil.
Method B: Oven (easier for large batches). Preheat oven to 475°F (245°C) with a baking stone or heavy baking sheet inside. You will bake pitas directly on the hot stone, one or two at a time.
8. Cook the Pita (Intensity: High – Watch closely, 1-2 min per pita)
For skillet method: Place one rolled pita onto the hot, dry pan. Cook for 30–45 seconds. Small bubbles will appear. Flip and cook the other side for 30–45 seconds. Now, here’s the magic: Flip again. Within 10–20 seconds, the pita should puff up like a balloon. If it doesn’t, your pan wasn’t hot enough or you rolled unevenly. Remove to a plate and cover immediately with a clean towel to keep soft. Repeat with remaining pitas, stacking and covering as you go.
For oven method: Slide the rolled pita directly onto the preheated baking stone/sheet. Bake for 2–3 minutes. It should puff dramatically. No need to flip.
9. Cool Softly (Last step before serving)
Transfer each cooked pita to a plate and cover with a kitchen towel immediately. This traps steam, keeping them pliable. Do not leave them uncovered, or they will crisp into chips.